This article contains affiliate links. We may earn a commission at no extra cost to you.
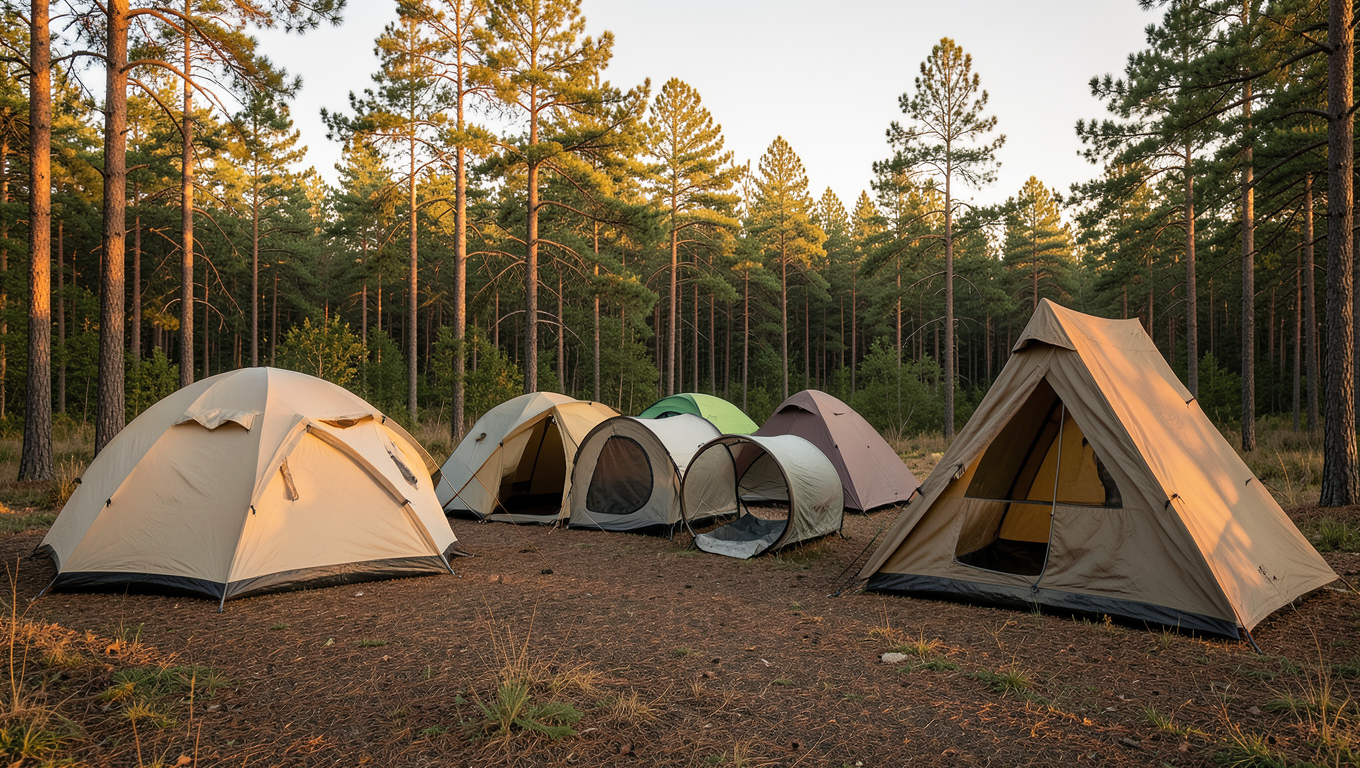
Walk into any outdoor retailer and you’ll face dozens of tent designs—domes, tunnels, A-frames, geodesics, and shapes that defy simple classification. Each design evolved to solve specific problems: wind resistance, interior space, weight, setup speed, or cost. Understanding these trade-offs helps you match a tent to your actual camping conditions rather than marketing claims.
I’ve pitched tents in Adirondack winters, desert windstorms, and soggy Pacific Northwest forests. The “best” tent depends entirely on how you camp, what weather you’ll face, and how much weight you’re willing to carry. Here’s what actually matters when comparing tent types.
Quick Comparison: Tent Types at a Glance
| Tent Type | Best For | Weight Range | Wind Resistance | Interior Space | Setup Difficulty |
|---|---|---|---|---|---|
| Dome | All-around use | 4-8 lbs | Good | Moderate | Easy |
| Tunnel | Bike touring, groups | 5-12 lbs | Poor (broadside) | Excellent | Moderate |
| Geodesic | Alpine, winter | 6-10 lbs | Excellent | Moderate | Complex |
| A-Frame | Minimalists, thru-hikers | 1-3 lbs | Fair | Poor | Easy |
| Cabin | Car camping, families | 15-30 lbs | Poor | Excellent | Moderate-Hard |
| Pop-Up | Festival camping | 5-10 lbs | Very Poor | Poor | Instant |
| Pyramid/Tipi | Ultralight groups | 1-4 lbs | Good | Good (floor area) | Easy |
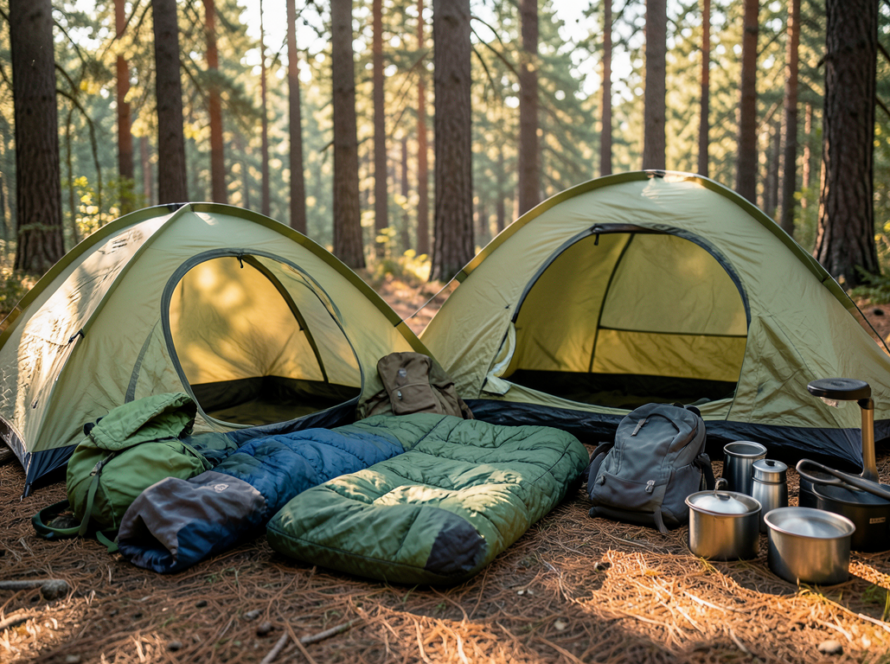
Dome Tents: The Workhorse Design
Two or three poles cross over the tent body, creating a self-supporting dome shape. This design dominates because it balances livability, weather resistance, and ease of setup better than any other configuration.
The crossing poles create natural tension that sheds wind from multiple directions. Unlike tunnel tents, you can rotate a dome tent to face away from weather without restaking. Most dome tents stand up before you stake them, which matters when you’re pitching on rock or hard ground where stakes won’t penetrate.
I’ve used dome tents from $89 Coleman models to $500 mountaineering shelters. The basic geometry works across price points—you’re paying for lighter materials, better fabrics, and more thoughtful details like vestibule space and ventilation.
The main limitation: vertical walls would provide more usable interior space, but dome tents slope inward. A 3-person dome tent comfortably sleeps two adults with gear. Plan on sizing up if you want actual room to move.
When to choose a dome: Car camping, backpacking, shoulder-season trips, anywhere you need reliable all-weather performance without specialized skills.
Tunnel Tents: Maximum Space, Minimum Weight
Parallel hoops create a tunnel shape with near-vertical walls and exceptional floor space for the weight. A 2-person tunnel tent often provides as much room as a 3-person dome while weighing a pound less.
The catch: tunnel tents aren’t self-supporting and perform poorly in crosswinds. You must stake out both ends before the tent takes shape, and wind hitting the broadside can collapse the structure. I learned this during a Wyoming windstorm that had my tunnel tent folding like an accordion until I repositioned it lengthwise to the wind.
European campers favor tunnel designs because they maximize interior volume for bike touring and extended trips where you spend time inside the tent. The long vestibules provide excellent gear storage—I’ve cooked meals in tunnel tent vestibules during multi-day rain.
When to choose a tunnel: Bike touring, car camping where weight matters, situations where you can orient the tent into prevailing winds, extended trips where interior space justifies the setup requirements.
Geodesic Tents: Built for Punishment
Four or more poles cross multiple times, creating a dome with triangulated panels. This distributes stress across the entire structure, making geodesic tents the strongest design for extreme conditions.
I’ve weathered 60 mph gusts in a geodesic tent on Mount Washington while watching other campers retreat. The multiple pole crossings mean if one pole section fails, the tent maintains structural integrity. In winter camping, geodesic designs shed snow loads better than simpler domes.
You pay for this strength with weight, cost, and complexity. A 2-person geodesic tent weighs 7-9 pounds compared to 4-5 pounds for a comparable dome. Setup takes longer with more pole sleeves to thread and more stake points to secure. Expect to spend $400-$800 for quality geodesic designs from brands like The North Face or Mountain Hardwear.
When to choose a geodesic: Alpine climbing, winter camping, exposed locations above treeline, any situation where tent failure creates serious risk.
A-Frame and Tarp Tents: Ultralight Simplicity
A single ridgeline supported by trekking poles or end stakes creates a simple A-shaped shelter. Modern tarp tents use this basic geometry with enclosed floors and bug netting, weighing 1-2 pounds for a solo shelter.
I switched to a tarp tent for thru-hiking after years with traditional backpacking tents. The weight savings (my current shelter is 18 ounces) matters over hundreds of miles. Setup is fast once you understand stake placement and guyline tension—five minutes in practiced hands.
The limitations are real: minimal interior space, condensation management requires careful ventilation, and wind resistance depends heavily on proper pitching. You’re sleeping close to sloped walls, and sitting up requires positioning yourself in the center peak. These aren’t tents for hanging out during storm days.
Tarp tents also demand good campsite selection. You need trees or ground that accepts stakes. Rocky or frozen ground makes pitching difficult without experience.
When to choose an A-frame/tarp tent: Thru-hiking, fastpacking, any trip where every ounce matters and you’re comfortable with minimalist shelter.
Cabin Tents: Car Camping Comfort
Near-vertical walls and tall center heights (6-7 feet) create room to stand and move. Cabin tents prioritize livability over portability, with weights ranging from 15-30 pounds for 4-6 person models.
These are base camp shelters. I use a cabin tent for family camping trips where we drive to the site and spend several days. The ability to stand while changing clothes, organize gear on cots, and move around during rain makes extended trips more comfortable.
Wind resistance is poor compared to dome designs. The large flat panels catch wind like sails, and the tall profile creates more surface area for gusts to push against. Stake every guyline and avoid exposed sites. I’ve seen cabin tents collapse in moderate winds when improperly secured.
Setup requires 15-30 minutes and often benefits from two people. Many cabin tents use color-coded poles and clips, but the sheer size makes solo pitching awkward.
When to choose a cabin tent: Car camping with family or groups, base camps for hunting or fishing trips, anywhere you drive to the site and prioritize comfort over portability.
Pop-Up Tents: Speed Over Everything
Pre-attached poles allow these tents to spring into shape when removed from their stuff sack. Setup takes 30 seconds. Packdown takes considerably longer as you wrestle the tent back into a compact disc.
I’ve used pop-up tents for festival camping and overnight trips where I arrive after dark. The instant setup is genuinely convenient. The trade-off: poor wind resistance, limited ventilation, cramped interiors, and frustrating pack-down that requires specific folding techniques.
The pre-tensioned poles that make setup instant also create weak points. I’ve had pop-up tent poles fail after a season of use, and replacement is often impossible—you replace the entire tent.
When to choose a pop-up tent: Festival camping, kids’ backyard camping, casual overnight trips where convenience outweighs performance.
Pyramid and Tipi Tents: Ultralight Group Shelters
A single center pole (often a trekking pole) supports a pyramid or conical shelter. This design provides excellent floor space for minimal weight—a 4-person pyramid tent can weigh under 3 pounds.
The center pole creates a dead zone where you can’t place sleeping pads, but the sloped walls provide more usable space than you’d expect. I’ve sheltered groups of four in pyramid tents during backpacking trips, with gear stored around the perimeter.
Wind resistance is good when properly staked. The aerodynamic shape sheds gusts effectively, and the simple geometry means fewer failure points. The single pole setup is fast once you understand proper stake placement and tension.
Condensation management requires attention. The large interior volume helps, but you need to maintain ventilation gaps and avoid contact with walls. Some pyramid tents offer inner bug netting tents that create an air gap for better moisture control.
When to choose a pyramid/tipi tent: Ultralight group backpacking, winter camping (these shelters accommodate wood stoves), situations where you want maximum floor space per ounce carried.
Backpacking vs Car Camping Tent: What Actually Matters
This distinction matters more than specific tent shapes. Backpacking and car camping impose different constraints that drive design choices.
Backpacking tents prioritize weight and packed size. A 2-person backpacking tent weighs 3-5 pounds and compresses to the size of a Nalgene bottle. You sacrifice interior space, vestibule area, and often durability. Fabrics are thinner (15-20 denier floors vs 70+ denier for car camping), poles are lighter aluminum or carbon fiber, and features are minimal.
I’ve used the same backpacking tent for five years, but it shows wear. The floor has required seam sealing twice, and the fabric is noticeably thinner. This is expected—backpacking tents balance longevity against weight.
Car camping tents ignore weight to maximize comfort and durability. A 4-person car camping tent weighs 12-20 pounds with thick floors, steel poles, and features like room dividers, electrical cord ports, and attached screen rooms. Setup is slower, but you’re not carrying the tent on your back.
The practical difference: if you’re hiking more than a mile from your vehicle, you want a backpacking tent. If you’re driving to your campsite, car camping tents provide substantially more comfort for the same money.
Single-Wall vs Double-Wall Construction
This design choice cuts across tent types and significantly affects performance.
Double-wall tents use a breathable inner tent body and separate waterproof rainfly. Air circulates between layers, carrying moisture away from the sleeping area. This design manages condensation better and provides vestibule space under the fly. Most tents under $400 use double-wall construction.
I prefer double-wall tents for three-season camping. The condensation management is noticeably better during humid conditions, and I can pitch the inner tent alone during clear weather for stargazing.
Single-wall tents combine waterproofing and structure in one layer, saving 8-16 ounces. They use waterproof-breathable fabrics like Dyneema Composite Fabric (formerly Cuben Fiber) or proprietary laminates. The weight savings is real, but condensation management requires more attention to ventilation and campsite selection.
I’ve used single-wall tents in dry Western climates with good results. In humid Eastern forests, I’ve woken to moisture on the tent walls even with vents fully open. The breathable fabrics work, but they can’t match the condensation control of a double-wall design with an air gap.
Single-wall tents cost more—expect $400-$800 for quality designs. You’re paying for expensive fabrics and specialized construction.
Freestanding vs Non-Freestanding Tents
Freestanding tents use pole structure to stand up before staking. Dome and geodesic tents are typically freestanding. You can pick them up and move them, which helps when you discover a rock under your sleeping pad at midnight. Setup works on any surface, though you should still stake for wind resistance.
Non-freestanding tents require stakes or guylines to maintain shape. Tunnel tents, tarp tents, and pyramid shelters fall in this category. They’re often lighter because the stakes and guylines provide structural support rather than heavier pole systems.
I’ve camped on granite slabs where stakes won’t penetrate. In those situations, freestanding tents work with rock anchors or simply their own weight. Non-freestanding designs require creative solutions—tying to trees, piling rocks on stakes, or using specialized rock anchors.
The practical consideration: if you frequently camp above treeline on rock or in winter on snow platforms, freestanding designs provide more flexibility. For typical forest or meadow camping, non-freestanding tents work fine and often save weight.
Seasonality: 3-Season vs 4-Season Tents
3-season tents handle spring through fall conditions: rain, moderate wind, and temperatures above 20°F. They emphasize ventilation with large mesh panels to prevent condensation during warm nights. The rainfly typically doesn’t extend to the ground, allowing airflow underneath.
Most recreational campers need 3-season tents. I use mine from April through October in the Northeast, including shoulder-season trips with overnight lows in the 20s. The ventilation that makes 3-season tents comfortable in summer means they’re drafty in winter.
4-season tents add winter capability with stronger poles, fewer mesh panels, rainflies that extend to the ground, and snow flaps to seal the perimeter. They’re built to handle snow loads and sustained high winds.
I’ve winter camped in both 3-season and 4-season tents. The 4-season tent was noticeably warmer with less spindrift infiltration, but it was also stuffier and required careful ventilation management to prevent condensation. In temperatures below 10°F or during snowfall, the 4-season design is worth the extra weight and cost.
Don’t buy a 4-season tent unless you actually winter camp. They’re heavier, more expensive, and uncomfortably warm during summer. A 3-season tent with a good sleeping bag handles cold weather down to the teens just fine.
Capacity Ratings: The Lies We Tell Ourselves
Tent capacity ratings assume sleeping pad dimensions only—no gear, no space between occupants, no room to move. A “3-person” tent fits three people lying shoulder-to-shoulder with gear stored outside.
My rule: subtract one person from the rating for actual comfort. A 3-person tent comfortably sleeps two adults with gear inside. A 2-person tent works for solo camping with a dog or substantial gear storage.
Tent dimensions matter more than capacity ratings. Look for floor dimensions and interior height. A 2-person tent with 30 square feet of floor space is cramped. 35-40 square feet provides reasonable room for two people and gear.
For backpacking, I accept tighter quarters to save weight. For car camping, I size up aggressively. My family of three uses a 6-person cabin tent for weekend trips, which provides actual living space rather than just sleeping area.
Materials and Durability Considerations
Tent fabrics balance weight, durability, and cost. Understanding the trade-offs helps you match a tent to your use pattern.
Floor fabrics: Measured in denier (thread thickness). Backpacking tents use 15-30 denier floors to save weight. Car camping tents use 70-150 denier for puncture resistance. I’ve put holes in lightweight floors with gravel and sticks. A footprint (ground cloth) extends floor life significantly.
Body fabrics: Ripstop nylon or polyester in 15-40 denier. Lighter fabrics save weight but tear more easily. Ripstop weaving prevents tears from spreading, but it doesn’t prevent initial punctures.
Rainfly fabrics: Polyurethane or silicone-coated nylon provides waterproofing. Silicone coatings (silnylon) are more durable and don’t degrade as quickly as polyurethane, but they can’t be seam-taped—you must use liquid seam sealer. Polyurethane-coated fabrics accept tape sealing but break down faster with UV exposure.
Poles: Aluminum alloy (7000-series or DAC) for most tents. Carbon fiber saves 20-30% weight at double the cost. Fiberglass poles appear on budget tents under $150—they’re heavier and more prone to shattering in cold weather.
I’ve broken poles on every material type. Carry a pole repair sleeve regardless of pole material. The difference is that aluminum poles bend before breaking, giving you warning. Fiberglass poles shatter suddenly.
Ventilation and Condensation Management
Every tent generates condensation from breathing and body moisture. A person exhales about a pint of water vapor during eight hours of sleep. That moisture condenses on cold tent walls, creating wet conditions by morning.
Good tent design manages this with:
- Mesh panels: Allow moisture to escape while keeping bugs out
- Adjustable vents: High and low vents create airflow even with the rainfly closed
- Rainfly gap: Space between fly and ground allows air circulation
- Double-wall construction: Air gap between inner tent and fly carries moisture away
I’ve woken to soaked tent walls in poorly ventilated shelters. The fix: crack vents even during rain, avoid pitching in depressions where cold air pools, and wipe down walls before moisture drips on your sleeping bag.
Single-wall tents require more active condensation management. I keep a small pack towel to wipe walls in the morning and ensure vents stay open even during weather.
Setup Complexity and Learning Curve
Your first time pitching any tent takes three times longer than subsequent attempts. Some designs are more forgiving than others.
Easiest: Dome tents with color-coded poles and clip attachments. Pop-up tents require no skill but create pack-down frustration.
Moderate: Tunnel tents and cabin tents require understanding stake placement and pole routing. Practice at home before your trip.
Complex: Geodesic tents with multiple poles, tarp tents requiring proper guyline tension, and pyramid shelters needing precise stake angles.
I’ve watched experienced campers struggle with unfamiliar tent designs in the dark and rain. Practice setup in your backyard until you can pitch the tent by feel. Time yourself—if it takes more than 10 minutes in daylight, you’ll struggle in adverse conditions.
Price Ranges and What You’re Buying
Under $150: Budget car camping tents with fiberglass poles, heavy fabrics, and basic features. These work fine for occasional use but don’t expect multi-year durability. Coleman, Ozark Trail, and Core make serviceable tents in this range.
$150-$350: Quality 3-season tents with aluminum poles, better fabrics, and thoughtful design. This range includes entry-level backpacking tents and mid-range car camping shelters. REI Co-op, Kelty, and Alps Mountaineering offer good value here.
$350-$600: Premium backpacking tents with advanced fabrics, lightweight construction, and proven designs. Brands like Big Agnes, MSR, and Nemo dominate this range. You’re paying for weight savings and refined features.
Over $600: Specialized tents for extreme conditions or ultralight designs using expensive materials like Dyneema. Hilleberg, Zpacks, and high-end models from major brands. Only worth it if you’re pushing into challenging conditions or counting every ounce.
I’ve used tents across all price ranges. The $200-$400 range offers the best value for most campers—you get quality materials and construction without paying for marginal weight savings or specialized features you may never use.
Matching Tent Type to Your Camping Style
Weekend car campers: Dome or cabin tent in the $150-$300 range. Prioritize interior space and ease of setup over weight. A 4-6 person tent for 2-3 people provides comfortable living space.
Backpackers doing 3-5 day trips: Lightweight dome or semi-freestanding tent, 3-5 pounds for two people. Spend $250-$450 for quality construction that lasts multiple seasons.
Thru-hikers and fastpackers: Tarp tent or ultralight A-frame under 2 pounds. Accept the space limitations for weight savings. Budget $300-$500 for proven designs.
Alpine and winter campers: 4-season geodesic tent with proven cold-weather performance. This isn’t the place to economize—spend $500-$800 for reliability in serious conditions.
Bike tourers: Tunnel tent for maximum space at reasonable weight. Look for models with large vestibules for gear storage. $300-$500 range.
Family camping with kids: Cabin tent with room dividers or multiple rooms. Weight doesn’t matter—focus on livability. $200-$400 gets you spacious, durable shelters.
I own three tents: an ultralight tarp tent for solo backpacking, a 3-season dome for general backpacking and shoulder-season trips, and a cabin tent for family car camping. Each excels in its specific role. One tent can’t optimize for all conditions.
Getting Your Free Camping Gear Planning Checklist
Choosing the right tent is just one piece of camping preparation. We’ve created a comprehensive camping gear planning checklist that helps you organize everything from shelter to cooking systems. Download your free checklist here and ensure you never forget critical gear again.
Frequently Asked Questions
What’s the difference between a 3-season and 4-season tent?
3-season tents are designed for spring through fall with emphasis on ventilation, lighter fabrics, and rainflies that don’t extend to the ground. They handle rain and moderate wind but aren’t built for snow loads. 4-season tents add winter capability with stronger poles, minimal mesh panels, full-coverage rainflies, and snow flaps to seal the perimeter. They’re heavier and less ventilated but handle snow accumulation and sustained high winds. Most campers only need 3-season tents unless they specifically winter camp in harsh conditions.
How do I know what size tent I actually need?
Subtract one person from the manufacturer’s capacity rating for realistic comfort. A 3-person tent comfortably fits two adults with gear inside. Tent capacity ratings assume sleeping pad dimensions only with no space between occupants or room for gear. Look at actual floor dimensions rather than capacity numbers—35-40 square feet works for two people with gear, while 50+ square feet provides comfortable space for three. For car camping, size up aggressively since weight doesn’t matter. For backpacking, accept tighter quarters to save weight.
Are expensive lightweight tents worth the cost for occasional backpacking?
Not usually. The $200-$400 range offers quality backpacking tents weighing 4-5 pounds for two people, which is light enough for weekend trips and short backpacking adventures. Tents over $500 save another 1-2 pounds using expensive materials like Dyneema or carbon fiber poles. That weight savings matters for thru-hiking or when you’re covering serious miles, but occasional backpackers won’t notice the difference enough to justify doubling the cost. Invest in a quality mid-range tent and spend the savings on a better sleeping bag or pad.
Can I use a car camping tent for backpacking?
Technically yes, but it’s miserable. Car camping tents weigh 12-25 pounds compared to 3-5 pounds for backpacking tents, and they pack much larger. Carrying that extra weight even a few miles is exhausting and limits how far you can travel. If you’re only hiking a quarter-mile from your vehicle, a car camping tent works fine. Beyond that, the weight penalty isn’t worth it. If you do both types of camping regularly, you need two tents optimized for each use case.
How do I prevent condensation in my tent?
Condensation forms when warm, moist air from breathing contacts cold tent walls. Manage it by maximizing ventilation—keep vents open even during light rain, crack the door if weather allows, and ensure your rainfly has proper clearance from the tent body. Avoid pitching in depressions where cold air pools. Wipe down walls with a pack towel before moisture drips on your sleeping bag. Double-wall tents manage condensation better than single-wall designs because the air gap between inner tent and rainfly carries moisture away. Some condensation is inevitable in humid conditions—focus on managing it rather than eliminating it completely.