This article contains affiliate links. We may earn a commission at no extra cost to you.
Emergency food storage breaks down into five main categories, each with distinct advantages and limitations. I’ve used all of them during field tests, power outages, and backcountry trips. Here’s what you need to know to build a system that actually works.
The Five Main Types of Emergency Food
Understanding the core categories helps you match storage methods to your specific situation. Most people need a combination rather than relying on a single approach.
Freeze-Dried Meals
Freeze-dried food removes 98-99% of moisture through sublimation, leaving food that weighs about 10% of its original weight. Mountain House, the brand I’ve used most extensively, claims 30-year shelf life for their pouches when stored properly. I’ve eaten 15-year-old freeze-dried scrambled eggs that tasted identical to fresh packages.
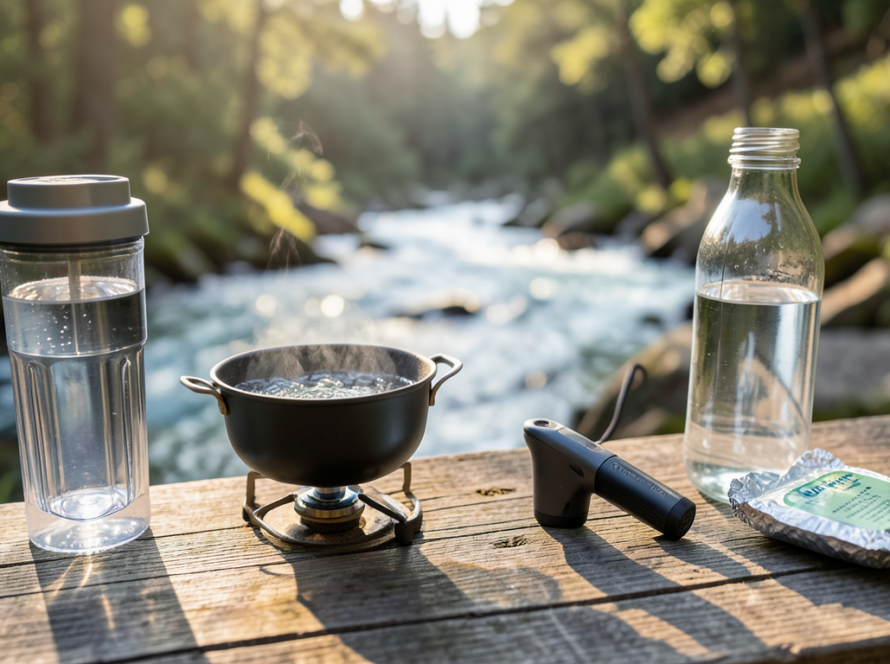
The rehydration process takes 8-15 minutes with boiling water. Cold water works but extends the time to 20-30 minutes and leaves a chewier texture. Each pouch typically requires 1-2 cups of water, which matters if you’re in a situation where water is limited.
Calorie density varies significantly. Breakfast meals average 250-350 calories per serving, while dinner entrees run 300-500 calories. The “serving” sizes on packages are misleading—most adults need 1.5-2 pouches for a satisfying meal. Calculate your needs based on 1,800-2,400 calories per person per day for moderate activity.
Cost runs $8-15 per pouch for name brands. Bulk buckets bring the per-meal cost down to $6-9. Store brands from Costco or Augason Farms offer similar quality at 20-30% lower prices.
Dehydrated Foods
Dehydration removes 90-95% of moisture using heat, which is less thorough than freeze-drying. This affects both texture and shelf life. Dehydrated foods last 15-25 years versus 30 years for freeze-dried, and they rehydrate with a softer, sometimes mushy texture.
The advantage is cost. Dehydrated meals run $4-8 per serving, about half the price of freeze-dried equivalents. I keep dehydrated soups, rice dishes, and vegetable blends as everyday rotation stock that I actually use in normal cooking.
Dehydrated fruits and vegetables work better than proteins. Dehydrated chicken turns rubbery, while freeze-dried chicken maintains texture. Conversely, dehydrated apples, carrots, and potatoes perform nearly as well as freeze-dried versions at significant savings.
MREs (Meals Ready to Eat)
Military MREs contain a wet-packed entree, side items, dessert, and accessories in a sealed pouch. The main advantage is zero preparation—you can eat them cold, though they’re better heated with the included flameless ration heater.
Shelf life depends heavily on storage temperature. At 70°F, MREs last 5 years. At 80°F, that drops to 3 years. Above 90°F, you’re looking at 18 months. I’ve stored MREs in an Arizona garage and watched them degrade in two years. Temperature matters more for MREs than any other emergency food type.
Each MRE provides 1,200-1,300 calories, making them true single-meal solutions. They weigh 18-26 ounces, significantly heavier than freeze-dried alternatives. For a 72-hour kit in your vehicle, that weight is irrelevant. For a bug-out bag, it’s prohibitive.
Civilian MREs cost $10-15 per meal. Military surplus runs $8-12 but requires careful inspection of the manufacturing date. I’ve found the best deals buying cases of 12 directly from manufacturers like Sopakco or AmeriQual.
Canned Goods
Standard grocery store cans provide the most economical emergency food storage for short to medium-term needs. Most canned goods carry a “best by” date of 2-5 years, but properly stored cans remain safe much longer. I’ve eaten 8-year-old canned vegetables with no quality loss beyond slight color fading.
The limitation is weight and bulk. A week’s worth of canned food for one person weighs 40-60 pounds and requires significant storage space. For home storage, this doesn’t matter. For portable emergency kits, it’s a dealbreaker.
Canned proteins—tuna, chicken, salmon, beans—offer the best value. A 5-ounce can of chicken costs $2-3 and provides 30-35 grams of protein. Compare that to freeze-dried chicken at $12-15 per equivalent serving.
Rotate canned goods every 2-3 years by using them in regular cooking and replacing them. This “pantry rotation” approach keeps your emergency food storage fresh without waste.
Bulk Staples
Rice, beans, wheat, oats, pasta, flour, and sugar stored in sealed containers provide the foundation for long-term food security. These staples cost 50-90% less than prepared emergency meals but require cooking skills and fuel.
White rice lasts 30+ years when stored in mylar bags with oxygen absorbers. Brown rice contains oils that go rancid, limiting shelf life to 6-12 months even with proper storage. Dried beans last 25-30 years but become harder and require longer cooking times as they age. I’ve cooked 10-year-old pinto beans that needed 4 hours of simmering versus 90 minutes for fresh beans.
A 25-pound bag of rice costs $15-25 and provides approximately 40,000 calories. That’s roughly 20 days of food for one person at $1 per day. No other emergency food storage option approaches this economy.
The catch is preparation time and fuel requirements. Cooking rice and beans from scratch takes 45-90 minutes and requires 2-4 cups of water per serving. In a short-term emergency with limited fuel, this becomes impractical. Bulk staples work best for long-term storage when you have time and resources to cook properly.
Comparing Emergency Food Storage Options
| Type | Shelf Life | Cost Per Day | Prep Time | Water Needed | Best Use Case |
|---|---|---|---|---|---|
| Freeze-Dried Meals | 25-30 years | $15-25 | 10-15 min | 1-2 cups | Bug-out bags, long-term storage |
| Dehydrated Foods | 15-25 years | $8-15 | 15-20 min | 1-2 cups | Home storage, rotation stock |
| MREs | 3-5 years | $30-45 | 0-5 min | None | Vehicle kits, no-cook situations |
| Canned Goods | 2-5+ years | $6-12 | 5-10 min | Minimal | Pantry rotation, short-term |
| Bulk Staples | 25-30 years | $1-3 | 45-90 min | 2-4 cups | Long-term home storage |
Building a Layered System
The most resilient emergency food storage combines multiple types. Here’s the approach I use and recommend:
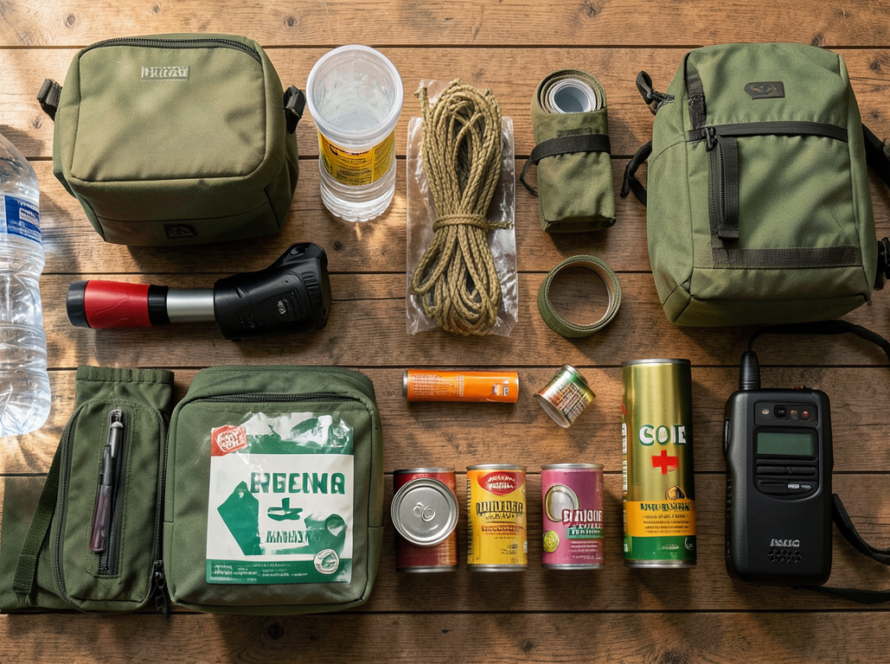
Layer 1: Immediate Access (3-7 days) — MREs and canned goods that require minimal preparation. Store these in easily accessible locations and vehicle emergency kits. This layer gets you through power outages and immediate evacuations.
Layer 2: Short-Term (2 weeks to 3 months) — Freeze-dried and dehydrated meals supplemented with canned proteins and vegetables. This provides variety and reasonable preparation requirements. I keep this in plastic storage bins in a climate-controlled area.
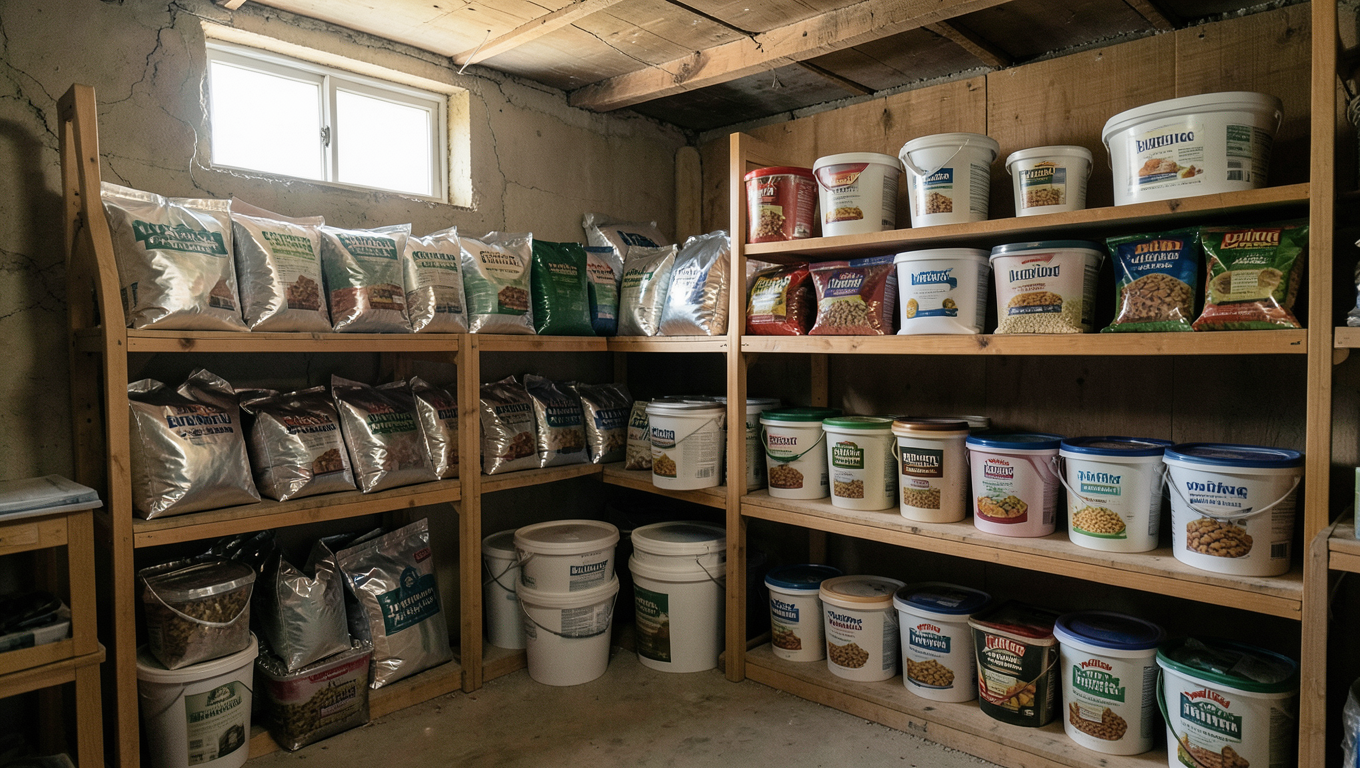
Layer 3: Long-Term (3 months to 1 year+) — Bulk staples in mylar bags with oxygen absorbers, stored in food-grade buckets. Add supplemental freeze-dried ingredients like powdered milk, eggs, butter, and vegetables. This layer requires the most storage space but provides the most economical long-term security.
Storage Conditions That Actually Matter
Temperature control extends shelf life more than any other factor. For every 10°F increase above 70°F, you cut shelf life roughly in half. A freeze-dried meal rated for 30 years at 70°F lasts only 15 years at 80°F and 7-8 years at 90°F.
I store my long-term supplies in a basement where temperatures stay between 55-65°F year-round. This extends shelf life beyond manufacturer claims. If you lack climate-controlled space, prioritize shorter-rotation foods and plan to replace them more frequently.
Light exposure degrades nutrients and affects flavor, particularly in clear or translucent packaging. Store food in opaque containers or in dark locations. I’ve compared freeze-dried meals stored in clear bins versus dark bins after 5 years—the difference in color and taste is noticeable.
Moisture is the enemy of long-term storage. Use oxygen absorbers in sealed containers for bulk staples. For pre-packaged emergency meals, the original packaging provides adequate protection if stored in a dry environment. I keep desiccant packs in my storage area and monitor humidity with a simple hygrometer, keeping it below 15%.
Calculating Your Actual Needs
Most people underestimate how much food they need. A sedentary adult requires 1,600-2,000 calories daily. Add physical activity—hauling water, chopping wood, walking long distances—and that jumps to 2,400-3,200 calories.
For a family of four planning a 30-day supply at 2,000 calories per person, you need 240,000 total calories. That’s approximately:
- 160 freeze-dried meal pouches (1,500 calories each)
- 200 pounds of rice and beans combination
- 240 canned goods (1,000 calories each)
- Or a combination approach using all three
I recommend starting with a 72-hour supply, then expanding to one week, then two weeks, then one month. Trying to build a year’s supply immediately leads to poor purchasing decisions and wasted money.
Ready to build your emergency kit? Download our free 72-hour kit checklist to get started with the essentials.
Supplemental Items That Complete the System
Emergency meals alone don’t provide complete nutrition. I supplement my storage with:
Multivitamins — Store a one-year supply per person. They’re cheap insurance against nutritional deficiencies during extended emergencies.
Fats and Oils — Freeze-dried meals are notoriously low in fats. Peanut butter lasts 2-3 years unopened. Coconut oil lasts 5+ years. Ghee (clarified butter) lasts 12-18 months at room temperature. These add essential calories and improve meal satisfaction.
Salt, Sugar, and Spices — Salt lasts indefinitely. Sugar lasts decades if kept dry. Spices lose potency after 2-4 years but remain safe. These transform bland emergency meals into something you’ll actually want to eat.
Comfort Foods — Hard candy, instant coffee, tea bags, hot chocolate, and drink mixes don’t provide significant nutrition but dramatically improve morale. I keep a separate “comfort box” with these items and rotate them annually.
What I Actually Keep
My personal system for a family of three includes:
- 12 MREs in each vehicle (3 days per person)
- 36 freeze-dried meals in bug-out bags and home storage (12 days)
- 50 pounds of canned goods rotated through regular pantry use (2-3 weeks)
- 200 pounds of rice, beans, oats, and pasta in mylar bags (3-4 months)
- Supplemental freeze-dried ingredients: 20 pounds powdered milk, 5 pounds powdered eggs, 3 pounds butter powder
This provides roughly 4 months of food security with varying levels of convenience and preparation requirements. The total investment was around $1,200 built over 18 months, averaging $65 per month.
Common Mistakes to Avoid
Buying food you won’t eat is the biggest waste I see. If you hate beans, don’t store 100 pounds of them. Test meals before buying in bulk. I’ve bought cases of freeze-dried meals, tried one, and realized they were inedible.
Ignoring dietary restrictions causes problems. If someone in your household has celiac disease, lactose intolerance, or food allergies, plan accordingly. Emergency food companies now offer gluten-free, dairy-free, and allergen-free options.
Forgetting about water is a critical oversight. Most emergency meals require water for preparation. Store at least one gallon per person per day—half for drinking, half for food preparation and hygiene. That’s 84 gallons for a family of four for one month.
Not practicing with your emergency food means you won’t know how to use it when stressed. I cook one freeze-dried or dehydrated meal monthly to maintain familiarity with preparation and confirm everything still tastes acceptable.
Frequently Asked Questions
How long does emergency food really last compared to the package dates?
Manufacturer dates are conservative estimates based on storage at 70°F. In practice, freeze-dried foods stored at 55-65°F in dark, dry conditions last 35-40 years. I’ve personally eaten 15-year-old freeze-dried meals with no detectable quality loss. The nutritional value degrades slowly—after 30 years, you might lose 10-20% of vitamins, but calories and protein remain stable. MREs are the exception; they rarely exceed their rated shelf life because the packaging is less protective than mylar or metal cans.
What’s the most cost-effective way to start emergency food storage on a tight budget?
Start with bulk staples and canned goods from regular grocery stores. A 25-pound bag of rice ($20), 25 pounds of dried beans ($25), a case of canned vegetables ($15), and a case of canned protein ($30) gives you 30-45 days of basic food for one person at $90. Add salt, cooking oil, and basic spices for another $15. This $105 foundation beats any pre-packaged emergency food kit for value. Once you have this base, add freeze-dried meals gradually—one or two per month as budget allows.
Can I store emergency food in my garage or attic?
Only if temperatures stay below 75°F year-round. Garages and attics in most US climates reach 90-120°F in summer, which destroys food quality rapidly. I’ve tested this directly—MREs in my Arizona garage degraded in 18 months versus 5+ years for identical MREs in my basement. If you lack climate-controlled space, prioritize shorter-shelf-life options like canned goods that you rotate frequently, or invest in a small climate-controlled storage unit. Some people successfully use insulated coolers or buried containers to moderate temperature swings.
Do I need special equipment to prepare emergency food?
For freeze-dried and dehydrated meals, you need a way to boil water. A camping stove with fuel canisters, a portable propane burner, or even a campfire works. I keep two backup cooking methods—a dual-fuel camping stove and a small rocket stove that burns twigs. For bulk staples, you need cookware and significantly more fuel. A 20-pound propane tank runs a single-burner stove for 40-60 hours of cooking time, enough to prepare 60-80 meals from scratch. MREs and canned goods require minimal equipment—at most, a can opener and a way to heat food, though both can be eaten cold.
How do I rotate emergency food so nothing goes to waste?
Use the FIFO method—first in, first out. Date everything when you buy it, store new items behind old items, and pull from the front. For canned goods and shorter-term items, integrate them into regular meal planning. I cook one “emergency food” meal per week using items from my storage, then replace them on my next grocery trip. For long-term freeze-dried meals, set a calendar reminder to test one meal every 2-3 months. This keeps you familiar with preparation and lets you catch any quality issues before you’re depending on the food in an actual emergency.